What is Clover flex?
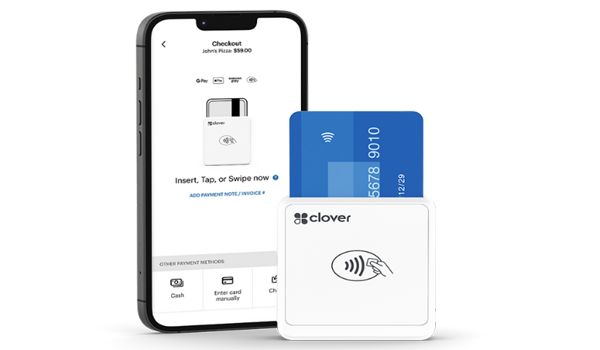
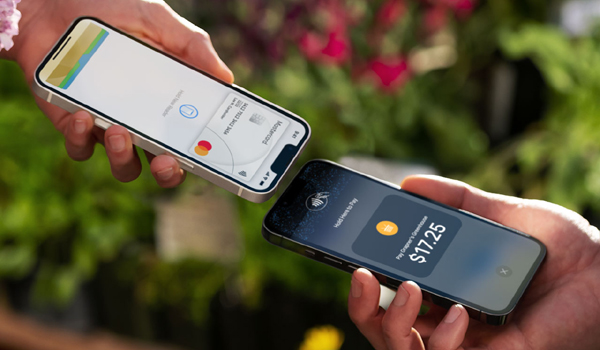
Clover Flex is a portable, all-in-one payment device designed for small businesses. It is a compact, handheld device that combines a touchscreen display, a built-in receipt printer, and a card reader, allowing businesses to process payments quickly and easily. With Clover Flex, merchants can accept various payment methods, including credit and debit cards, NFC payments (such as Apple Pay and Google Pay), and even gift cards. It also offers additional features like inventory management, employee management, and customer engagement tools. Overall, Clover Flex provides a flexible and convenient solution for businesses on-the-go or in need of a portable payment system.
How to set up the Clover flex
To set up the Clover Flex, follow these steps:
- Unbox the Clover Flex and ensure that you have all the necessary components, including the device itself, the power adapter, and any additional accessories.
- Plug one end of the power adapter into the charging cradle and the other end into a power source.
- Attach the Clover Flex to the charging cradle. The device will begin charging automatically.
- Turn on the Clover Flex by pressing and holding the power button located at the top of the device. The Clover logo will appear on the screen.
- Follow the on-screen prompts to select your preferred language and connect to a Wi-Fi network. The device will guide you through the necessary steps for Wi-Fi setup.
- Upon connecting to Wi-Fi, the Clover Flex will present the option to either log in using your existing Clover account or create a new one. If you already possess a Clover account, simply sign in with your credentials. Otherwise, follow the on-screen instructions to establish a new account.
- After signing in, the Clover Flex will update its software automatically. This may take a few minutes.
- Once the software update is complete, you will be prompted to personalize the device settings, such as entering your business information, setting up your product catalog, and configuring payment options.
- Follow the on-screen instructions to complete the setup process, including adding your inventory, configuring taxes, and setting up payment processing.
- Once the setup is complete, you can start using the Clover Flex for accepting payments, managing inventory, and accessing other features and functions.
It is important to note that the setup process may vary slightly depending on your specific merchant service provider or any additional customizations you may have. It's always a good idea to consult the user manual or reach out to your merchant service provider for detailed instructions specific to your Clover Flex setup.
How to configure Clover flex
Unboxing and Hardware Setup
- Carefully unbox your Clover Flex device and ensure that you have all the necessary components.
- Attach the power adapter and connect it to a power outlet.
- Power on the Clover Flex device and follow the instructions on the screen to complete the initial setup.
Network Connection
- Establish a stable internet connection for your Clover Flex device.
- Connect the device to a Wi-Fi network or use a data plan if available.
- Follow the on-screen prompts to connect to the chosen network.
Software Configuration
- Once the Clover Flex device is connected to the internet, it will automatically download and install any necessary updates.
- Enter your business information, such as business name and contact details, on the device.
- Set up your account and choose the appropriate settings for your business needs.
Payment Processing Setup
- Link your bank account or merchant service provider to your Clover Flex device.
- Configure payment options and settings, including accepting various payment types (credit cards, debit cards, etc.), setting up gratuities, and enabling contactless payments.
Customization and Integration
- Customize the user interface of your Clover Flex device, including logo, branding, and receipt designs.
- Integrate additional tools and services with 1. Unboxing and Hardware Setup.
- Carefully unbox your Clover Flex device and ensure that you have all the necessary components.
- Attach the power adapter and connect it to a power outlet.
- Power on the Clover Flex device and follow the instructions on the screen to complete the initial setup.
Employee Management
- Set up employee accounts and permissions on your Clover Flex device.
- Assign roles and access levels to different employees based on their responsibilities.
Testing and Troubleshooting
- Perform test transactions to ensure that the payment processing is functioning correctly.
- Familiarize yourself with the troubleshooting steps for common issues or errors that may arise during operation.
Training and Support
- Train your staff on how to use the Clover Flex device and its features.
- Refer to the Clover support resources, such as manuals, guides, and customer support, for any further assistance or questions.
How do I connect my Clover Flex to the internet?
To connect your Clover Flex to the internet, you can follow these steps:
- Power on your Clover Flex: Press and hold the power button located at the top of the device until it turns on.
- Set up a Wi-Fi connection: On the home screen, tap the gear icon for the Settings menu.
- Tap Wi-Fi: This will display a list of available Wi-Fi networks in your area.
- Select the desired network: Tap on the name of the Wi-Fi network you want to connect to. If the network is secure, you may be prompted for a password.
- Enter the Wi-Fi password, if required: If the selected network is protected, enter the password using the on-screen keyboard and then tap Connect.
- Wait for the connection: Once connected successfully, you will see a confirmation message, and the Wi-Fi icon will appear in the top left corner of the Clover Flex screen.
- Test the internet connection: Open a web browser or any app that requires an internet connection to ensure that the Clover Flex is connected to the internet.
Can I use Clover Flex without Wi-Fi?
Yes, you can use the Clover Flex even if you don't have a Wi-Fi connection. The device has built-in 3G cellular capabilities, allowing it to connect to the internet using a mobile data network. This enables you to process transactions and perform other functions on the device without the need for a Wi-Fi network. However, it's important to note that using the 3G cellular network may incur data charges, so it's advisable to check with your payment processor or Clover for any data plan requirements or costs associated with cellular connectivity.
Where is the Ethernet port on Clover Flex?
The Clover Flex does not have an Ethernet port. It primarily relies on wireless connectivity options such as Wi-Fi and Bluetooth for internet connection and communication. If you require a wired connection, you may consider using a separate device, such as a Clover Mini or a Clover Station, that has an Ethernet port.
Does Clover have a SIM card?
Yes, some versions of the Clover Flex come with a SIM card. The SIM card allows the device to connect to cellular networks and access the internet when Wi-Fi is not available. This allows for transaction processing and other functions even when there is no Wi-Fi network present. If your Clover Flex has a SIM card, it should be pre-installed in the device. However, it's important to note that having a SIM card typically requires a data plan from a cellular service provider. Therefore, you may need to consult with your payment processor or Clover to understand any associated data plan costs or requirements.
Does Clover need a static IP?
Clover does not necessarily require a static IP address, but it is recommended for businesses that plan to use the device for long-term, reliable connectivity.
Having a static IP address can provide benefits such as improved stability and ease of access for remote management. It allows the device to maintain the same IP address over time, making it easier to connect to from other devices or services.
However, if a static IP address is not available or not feasible for your business, Clover can still work using dynamic IP addressing. Dynamic IPs are assigned by the network's DHCP (Dynamic Host Configuration Protocol) server and can change over time. Clover devices are designed to handle dynamic IP addressing and can adapt to different IP assignments from the network.
Conclusion
Setting up the Clover Flex involves several steps. It's important to note that specific details may vary depending on the exact version and setup of your Clover Flex. It's always recommended to refer to the user manual or contact Clover support for detailed instructions tailored to your specific device and configuration.
