Introduction
In today’s digital age, setting up an e-commerce virtual terminal is a crucial step for businesses looking to sell products or services online. A virtual terminal allows you to process credit card transactions from anywhere with an internet connection, providing flexibility and convenience for online sales. This guide will walk you through the process of setting up your first e-commerce virtual terminal, covering everything from choosing the right service provider to completing your first transaction.
What is a virtual terminal?
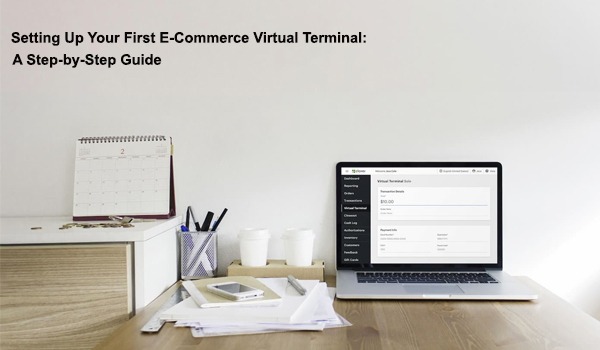
A virtual terminal is an online application that allows businesses to process credit card transactions without needing a physical card reader. This tool is accessed via a web browser and provides a simple interface for entering customer payment details, managing transactions, and generating reports.
Key Features of a Virtual Terminal
- Transaction Processing: Enter credit card details manually and process payments.
- Access from Any Device: Manage transactions from any device with an internet connection.
- Detailed Reporting: View transaction history, generate reports, and manage refunds.
- Customer Management: Store and manage customer information for future transactions.
Why You Need a Virtual Terminal for E-Commerce
A virtual terminal is essential for e-commerce businesses for several reasons:
Convenience
You can process payments from anywhere, which is ideal for online sales where you might not have physical interaction with customers.
Flexibility
Virtual terminals support various payment methods, including credit and debit cards, giving you the flexibility to cater to different customer preferences.
Scalability
As your business grows, virtual terminals can easily scale to handle increased transaction volumes without significant additional costs.
Efficient Transactions
They streamline the payment process, making it easier for you to manage orders, track payments, and handle customer service issues.
Choosing the Right Virtual Terminal Provider
Selecting the right provider for your virtual terminal is a critical step in setting up your e-commerce business. Carefully evaluate these factors before making your choice:
Transaction Fees
Different providers have varying fee structures. Look for a provider with competitive rates and clear, transparent fees.
Security Features
Ensure the provider offers robust security features like PCI-DSS compliance, fraud detection tools, and secure encryption for data.
Integration Options
Check if the virtual terminal can integrate with your existing e-commerce platform and other tools you use for managing your business.
Customer Support
Choose a provider with excellent customer support, including 24/7 availability via multiple channels (phone, chat, email).
Reputation and Reviews
Research the provider’s reputation through reviews and testimonials from other businesses.
Setting Up Your Virtual Terminal Account
Here’s a step-by-step guide for setting up your virtual terminal account:
Step 1: Apply for an Account
Visit the provider’s website and find the virtual terminal section. Complete the application form by providing details about your business, such as:
- Business Name: Enter the official legal name of your business.
- Business Address: Your business’s physical location.
- Contact Information: Your email and phone number.
- Bank Account Details: Information for the account where your funds will be deposited.
Step 2: Verify Your Identity
Most providers will require you to verify your identity and business information. This may involve submitting documents like:
- Business License: Documentation that confirms your business is officially registered.
- Tax ID Number: Your business’s tax identification number.
- Bank Statements: Recent bank statements to verify your business account.
Step 3: Review and Sign Terms of Service
Read the terms of service carefully. Make sure you understand the fee structure, service agreements, and cancellation policies. After reading, you will need to electronically sign the agreement to complete the setup process.
Step 4: Activate Your Account
Once your application is approved, you will receive instructions on how to activate your virtual terminal account. Follow these instructions to set up your account and access the virtual terminal dashboard.
Configuring Your Virtual Terminal for E-Commerce
After setting up your account, you need to configure your virtual terminal to fit your e-commerce needs.
Step 1: Set Up Payment Methods
Log in to your virtual terminal account and navigate to the payment methods section. Add and configure the payment methods you wish to accept, such as credit cards, debit cards, and digital wallets.
Step 2: Customize Your Payment Form
Most virtual terminals offer options to customize your payment form. Configure the form to capture the necessary information, including:
- Customer’s Name
- Credit Card Number
- Expiration Date
- CVV Code
- Billing Address
Step 3: Configure Notification Settings
Set up notifications for different transaction events, such as successful payments, failed transactions, or refunds. This ensures you stay informed about transaction statuses and can respond quickly to issues.
Step 4: Set Up User Permissions
If you have a team, configure user roles and permissions to control who can access various features of the virtual terminal. Allocate roles according to each team member's responsibilities.
Integrating Your Virtual Terminal with Your E-Commerce Platform
To process transactions directly from your e-commerce website, you need to integrate the virtual terminal with your e-commerce platform.
Step 1: Access Integration Settings
Log in to your virtual terminal account and navigate to the integration or API section. Here you will find the tools and documentation for integrating with your e-commerce platform.
Step 2: Obtain API Credentials
You will need API credentials such as a merchant ID, API key, and secret key. These credentials allow your e-commerce platform to communicate with your virtual terminal.
Step 3: Configure E-Commerce Platform
Access your e-commerce platform’s admin dashboard and go to the payment settings section. Enter the API credentials provided by your virtual terminal provider and adjust the payment options as necessary.
Step 4: Test the Integration
Perform test transactions to ensure that the integration works correctly. Verify that transactions are processed as expected and that you receive accurate data in your virtual terminal account.
Testing Your Virtual Terminal
Before launching your virtual terminal for real transactions, it’s essential to test it thoroughly.
Perform Test Transactions
Use test credit card numbers provided by your virtual terminal provider to simulate transactions. Check that payments are processed correctly, and you receive the appropriate notifications.
Verify Transaction Records
Ensure that transaction records are accurately displayed in your virtual terminal dashboard. Check that details such as payment amount, customer information, and transaction status are correct.
Test Refunds and Cancellations
Perform test refunds and cancellations to ensure that these features work properly. Confirm that refunds are processed correctly and that the funds are returned to the customer.
Processing Transactions Using Your Virtual Terminal
With your virtual terminal set up and tested, you are ready to start processing transactions.
Step 1: Access Your Virtual Terminal
Open your web browser, navigate to your virtual terminal, and log in using your account credentials.
Step 2: Enter Customer Payment Information
Input the customer’s payment details into the virtual terminal’s payment form. Include the credit card number, expiration date, CVV code, and billing address.
Step 3: Process the Payment
Click the “Submit” or “Process” button to complete the transaction. The virtual terminal will handle the payment processing and display the results.
Step 4: Confirm the Transaction
Review the transaction confirmation to ensure that the payment was processed successfully. Check for any error messages or issues that need to be addressed.
Maintaining Security and Compliance
Security and compliance are critical for managing an e-commerce virtual terminal.
Ensure PCI-DSS Compliance
Make sure you adhere to the Payment Card Industry Data Security Standard (PCI-DSS) to protect customer payment information and maintain transaction security.
Implement Fraud Prevention Measures
Utilize the fraud detection tools provided by your virtual terminal service. Set up features like address verification systems (AVS) and card verification value (CVV) checks to minimize fraudulent transactions.
Regularly Update Security Measures
Keep abreast of current security practices and advancements. Consistently update your virtual terminal software and review security protocols.
Troubleshooting Common Issues
Here are some common issues you might encounter with your virtual terminal and how to resolve them:
Transaction Declined
- Possible Causes: Insufficient funds, incorrect payment information, or card issuer restrictions.
- Solution: Verify the payment details and ask the customer to check their card status or contact their card issuer.
Error Messages During Transactions
- Possible Causes: Technical glitches, incorrect API credentials, or connectivity issues.
- Solution: Review the error message for details and consult the provider’s support team if necessary.
Issues with Integration
- Possible Causes: Incorrect API credentials or configuration settings.
- Solution: Double-check your API credentials and integration settings. Reach out to your provider’s support team for assistance if problems persist.
Conclusion
Setting up your first e-commerce virtual terminal is a significant step in establishing your online business. By following this comprehensive guide, you can navigate the process, from choosing a provider to processing your first transaction, effectively.

