Get Started with the DC Direct PAX A3700
Setting up a new payment terminal might sound like a nightmare, but do not worry, you are in the right place! The DC Direct PAX A3700 is a strong, secure, and easy-to-use payment device that can easily take credit card transactions. Whether you run a retail store, restaurant, or mobile business, this guide will walk you through every step to get your terminal up and running without a hitch.
You'll learn exactly how to set up, connect, configure, and troubleshoot your device so you can start accepting payments confidently. Let's dive in!
Why Choose the DC Direct PAX A3700?
Before we begin the setup process, let's consider why the PAX A3700 is a great choice for businesses looking for a fast, reliable, and secure payment terminal.
Key Features of the PAX A3700
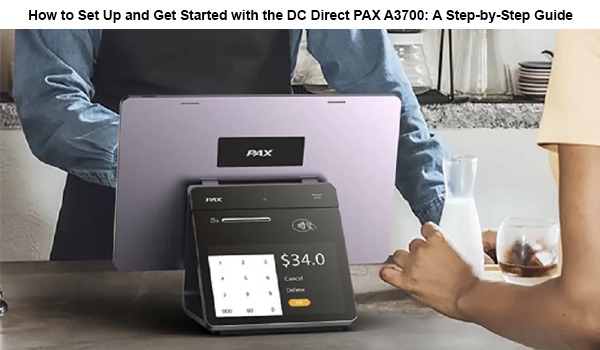
- Touchscreen Interface – Sleek, intuitive display to easily navigate
- Accepts All Major payment chip cards (EMV), magnetic stripes, contactless (NFC), and mobile wallets like Apple Pay & Google Pay
- Multifold Connectivity Options Works with Wi-Fi, Ethernet, and Cellular networks
- Built-in Security & Compliance Meets the latest PCI DSS and EMV security standards
- Compact & Modern Design Great for any countertop or mobile business
With fast processing speeds and multiple payment options, this device ensures a seamless checkout experience for businesses and customers.
Step 1: Unboxing & What's Inside
Your PAX A3700 should arrive in a well-packaged box containing:
- The PAX A3700 device
- Power adapter and charging cable
- Ethernet cable (if applicable)
- Battery (pre-installed or separate, depending on your model)
- Quick start guide & user manual
Before You Begin
- Inspect the device for damage – If anything is broken, contact your provider
- Verify all accessories – Make sure nothing is missing from the box
Once you’ve checked everything, you’re ready to move on to powering up your device.
Step 2: Charging and Powering Up
Charging Your Device
If your PAX A3700 runs on battery power, it’s best to fully charge it before using it for the first time. Plug in the power adapter and allow it to charge for at least 2-3 hours.
Turning It On
- Press and hold the power button (usually located on the side or back)
- The screen will light up and display the welcome screen
- Follow the on-screen instructions to set your language and basic settings
Once the device is on, we’ll need to connect it to the internet before moving forward.
Step 3: Connecting to the Internet
A stable internet connection is crucial for processing payments. The PAX A3700 offers three connectivity options:
1. Wi-Fi Connection (Most Popular Option)
- Go to Settings > Network > Wi-Fi
- Select your Wi-Fi network and enter the password
- Tap Connect and wait for confirmation
2. Ethernet Connection (For Wired Connection)
- Connect the Ethernet cable to the LAN port on your device
- The connection should automatically be detected through your terminal
3. Cellular Connection (For Mobile)
- If your terminal supports cellular, insert a SIM card
- Go to Settings > Network > Cellular
- Turn ON the cellular data and make sure the signal is strong
Once connected, your device may automatically download updates—this is normal and ensures your terminal is running the latest software.
Step 4: Configuring Payment Processing
Now that your terminal is online, it's time to configure your payment processing system. This step links your merchant account to the PAX A3700, so it can process credit card and debit card transactions.
How to Configure Payment Processing
- Access the payment processor portal with your merchant ID & login credentials
- Input business information such as name, tax ID, etc
- Turn on your accepted payment types, like Visa, Mastercard, AMEX, Apple Pay, etc
- Tax setup: you would input the applicable tax rates per your locality
- Select your preference for printing receipts or emailing receipts
If your payment processor pre-configured the device, it might automatically load these settings upon first connection.
Step 5: Updating Software & Enhancing Security
To ensure your PAX A3700 is secure and up to date, follow these steps:
Checking for Software Updates
- Go to Settings > System Updates
- Tap Check for Updates
- Install any available updates to keep your device optimized
Setting Up Security Features
- Enable password protection for admin settings
- Activate auto-lock after a certain period of inactivity
- Ensure encryption settings are enabled for secure transactions
With your device updated and secure, you’re almost ready to start taking payments!
Step 6: Running a Test Transaction
Before going live, run a test transaction to ensure everything is working correctly.
- Insert, swipe, or tap a test card
- Enter a small amount (e.g., $1.00)
- Print or email a test receipt
If the transaction goes through, congrats! Your device is now ready to accept payments????
Step 7: Troubleshooting Common Issues
You may sometimes still encounter problems, even after you've set it up properly. Here are some quick fixes:
Problem: Device Won't Turn On
- Check if the battery is charged
- Try a different power outlet or charging cable
Problem: No Internet Connection
- Restart the terminal and router
- Check Wi-Fi credentials or Ethernet cable connection
Problem: Transactions Not Processing
- Verify that your merchant account is active
- Check that the stability of the connection of your internet
- Check for pending updates of software
If problems persist, reach out to PAX customer support or even contact your payment processor for help.
Conclusion: You're Ready to Take Payments!
Setting up the DC Direct PAX A3700 is less complicated than you think. Here is a quick rundown of steps you should take:
- Unbox and inspect your device
- Charge and power it on
- Connect to the internet via Wi-Fi, Ethernet, or Cellular
- Configure payment processing with your merchant account
- Initiate a test transaction to ensure that all is working properly
With your terminal fully operational, you will now be able to accept seamless and secure payments from your customers!